
Landscape Trailer Maintenance Checklist: Before, During, and After the Season
Buying Guide • Jan 2026 • 12 min read
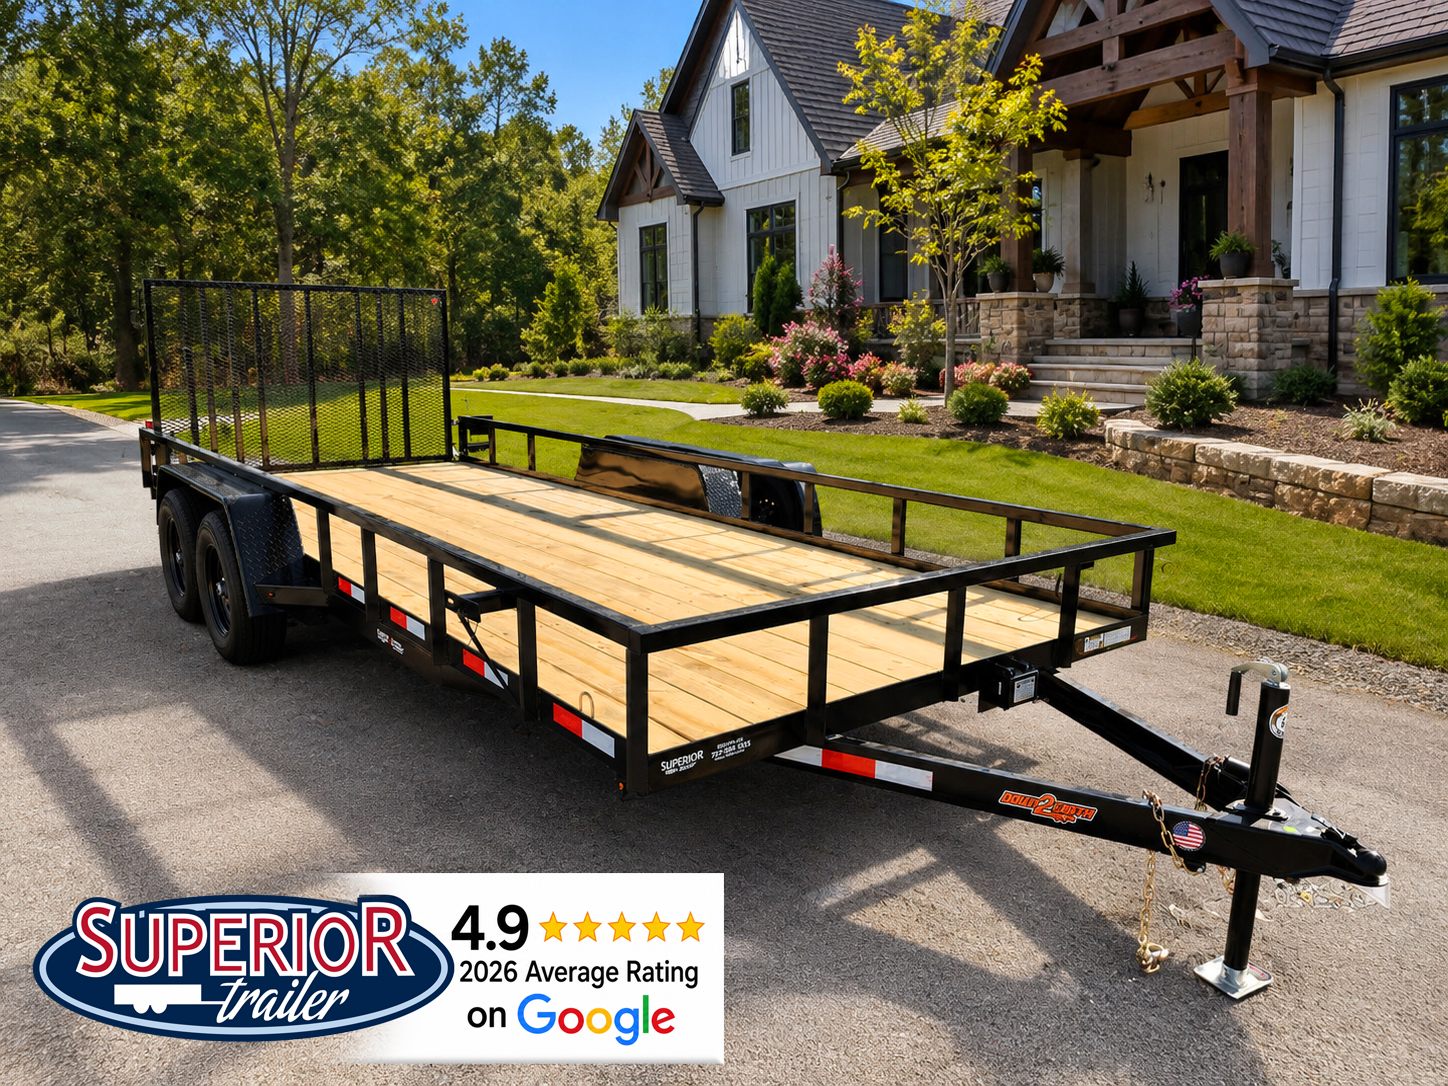
A landscape trailer rarely breaks down at a convenient time.
A worn wheel bearing, damaged tire, corroded electrical connection, loose deck board, or seized ramp-gate hinge can take a working trailer—and sometimes an entire landscaping crew—off the road during the busiest part of the season.
Fortunately, many common landscape trailer problems can be caught before they become expensive repairs or roadside emergencies.
A complete landscape trailer maintenance schedule should include three main stages:
- Pre-season preparation before the first major jobs of the year.
- In-season inspections while the trailer is being used regularly.
- Post-season maintenance before the trailer is stored or used less frequently.
The checklist below applies to landscape trailers, lawn-care trailers, open utility trailers, equipment trailers, and many other trailers used by contractors and property-maintenance crews.
Always compare these general recommendations with the maintenance instructions provided by your trailer, axle, brake, tire, and component manufacturers.
Quick Landscape Trailer Maintenance Checklist
| Maintenance period | Components to inspect | Recommended action |
|---|---|---|
| Before every haul | Hitch, coupler, safety chains and breakaway cable | Confirm everything is properly connected, secured and undamaged |
| Before every haul | Tires and wheels | Check inflation, visible damage, tread condition and loose lug nuts |
| Before every haul | Lights and electrical connection | Test running lights, brake lights and turn signals |
| Before every haul | Load and tie-downs | Secure equipment and verify that the trailer is not overloaded |
| Pre-season | Wheel bearings and hubs | Inspect, lubricate or service according to the manufacturer’s schedule |
| Pre-season | Brakes and breakaway system | Test operation and inspect for wear, damage or weak performance |
| Pre-season | Ramp gate and hinges | Inspect hinges, springs, latches, welds and mesh |
| Pre-season | Deck and frame | Check wood, steel, aluminum, fasteners, welds and crossmembers |
| During the season | Tires, lights and coupler | Complete a quick walk-around before each workday or haul |
| During the season | Hinges and pivot points | Lubricate as required for the trailer’s components |
| During the season | Fasteners and anchor points | Check for looseness, bending, cracking and excessive wear |
| Post-season | Entire trailer | Wash away grass, soil, fertilizer, salt and chemical residue |
| Post-season | Steel surfaces | Treat exposed metal and repair damaged protective coatings |
| Post-season | Bearings, brakes and suspension | Schedule service before extended storage when needed |
| Post-season | Tires and storage area | Inflate properly and park on a firm, well-drained surface |
Why Landscape Trailer Maintenance Matters
Landscape trailers operate in conditions that can be especially hard on equipment.
They are exposed to grass clippings, dirt, gravel, fertilizer, pesticides, fuel, moisture, road debris and changing temperatures. They may be loaded and unloaded several times per day, driven over uneven job sites, backed against curbs and stored outside between jobs.
That combination of frequent use and environmental exposure can affect:
- Tires and wheels
- Wheel bearings and hubs
- Electric brakes
- Wiring and trailer lights
- Wood decking
- Steel frames
- Ramp gates
- Spring-assist systems
- Couplers and jacks
- Safety chains
- D-rings and tie-down points
- Suspension hardware
Routine maintenance helps reduce unexpected downtime, protects the equipment being transported and may extend the useful life of the trailer.
For a landscaping company, trailer maintenance is also business maintenance. When the trailer is unavailable, the mowers, trimmers, blowers and other equipment carried on it may not reach the next job.
Steel, Aluminum and Wood-Deck Landscape Trailers
The basic inspection process is similar for most landscape trailers, but the trailer’s construction affects where extra attention is needed.
Steel Landscape Trailers
Steel trailers are durable and widely used by landscaping crews, but exposed steel can develop corrosion.
Inspect areas where paint or powder coating has been damaged by:
- Mower decks
- Trimmer racks
- Chains
- Loading ramps
- Gravel
- Equipment tires
- Road debris
- Fertilizer and lawn chemicals
Small chips should be cleaned and treated before corrosion spreads beneath the surrounding coating. Pay particular attention to welds, seams, crossmembers, the tongue and the lower portions of the frame.
Aluminum Landscape Trailers
Aluminum does not develop iron rust like steel, but it is not maintenance-free.
Inspect aluminum surfaces for:
- Cracks near welds
- Loose or damaged fasteners
- Pitting or oxidation
- Galvanic corrosion around dissimilar metals
- Damage caused by equipment or tie-downs
- Distortion around heavily loaded areas
The trailer’s bearings, tires, brakes, suspension, wiring and coupler still require regular attention regardless of the frame material.
Wood-Deck Landscape Trailers
Wood decking should be inspected for more than appearance.
Look for:
- Soft areas
- Rot
- Splitting
- Warping
- Loose boards
- Raised fasteners
- Damage near mower wheel paths
- Deterioration around the front and rear edges
A board that appears acceptable from above may be deteriorating underneath. Inspect the bottom of the deck and the points where the boards contact the frame whenever possible.
Replace damaged boards before they become unable to support the equipment being hauled.
Pre-Season Landscape Trailer Maintenance
Pre-season maintenance should be completed before the trailer returns to heavy daily use.
Finding a worn bearing, weak brake, cracked tire or damaged wire in the shop is much better than discovering it on the highway with a loaded trailer.
1. Inspect the Coupler and Hitch Components
Clean the coupler and inspect it for:
- Cracks
- Bent components
- Excessive wear
- Rust that interferes with movement
- A damaged latch
- Missing pins or clips
- Difficulty opening or closing
Confirm that the coupler size matches the hitch ball and that the latch fully closes around the ball.
Lubricate only the appropriate points according to the coupler manufacturer’s instructions. Replace any missing safety pin or locking device before towing.
The trailer should also sit approximately level when connected to the tow vehicle. A trailer that rides noticeably nose-high or nose-low may handle poorly and place an uneven load on tandem axles.
2. Check the Safety Chains and Breakaway System
Inspect every safety-chain link, attachment point and hook.
Replace a chain or hook that is:
- Stretched
- Cracked
- Severely corroded
- Bent
- Partially worn through
- Improperly attached
Cross the safety chains beneath the trailer tongue when connecting the trailer, unless the trailer or tow-vehicle manufacturer specifies otherwise.
For trailers equipped with electric brakes, inspect the breakaway cable, switch and battery. The cable should not be wrapped around the safety chain or connected in a way that prevents it from activating if the trailer separates from the tow vehicle.
Test the system according to the manufacturer’s instructions.
3. Inspect the Tires
Check tire pressure while the tires are cold and inflate them according to the trailer manufacturer’s tire-information label and the applicable tire requirements.
Do not guess based on appearance alone. A trailer tire can be underinflated without looking completely flat.
Inspect each tire for:
- Sidewall cracking
- Bulges
- Cuts
- Exposed cords
- Uneven wear
- Embedded screws or nails
- Flat spots
- Unusual tread patterns
- Valve-stem damage
Uneven wear can indicate more than a tire problem. It may point to improper inflation, an overloaded trailer, worn suspension parts, axle misalignment or wheel damage.
Remember to inspect the spare tire. A spare with no air or severe dry rot will not help during a roadside emergency.
4. Check the Wheels and Lug Nuts
Inspect the wheels for cracks, dents, corrosion and distortion.
Use a properly calibrated torque wrench to check wheel fasteners according to the trailer or wheel manufacturer’s specifications. Do not rely only on an impact wrench.
Newly installed wheels may require additional torque checks after a short period of travel. Follow the manufacturer’s required sequence and intervals.
Rust streaks extending away from a lug nut, an enlarged fastener hole or repeated loosening may indicate movement that requires professional inspection.
5. Inspect the Wheel Bearings and Hubs
Wheel bearings support the trailer’s load while allowing the wheels to rotate. A neglected bearing can overheat, damage the spindle or hub, or contribute to a wheel-end failure.
During a pre-season inspection, check for:
- Excessive wheel movement
- Grinding or roughness
- Unusual noise
- Grease leaking from the rear seal
- Contamination inside the hub
- Heat damage
- Pitted or discolored bearing surfaces
Bearing service intervals vary by axle and hub design. Conventional bearings, E-Z Lube-style systems, oil-bath hubs and sealed cartridge bearings do not all use the same procedure.
Do not assume that adding grease through a fitting replaces a complete inspection. Follow the exact instructions for the axle installed on the trailer.
Bearing and brake work should be completed by a qualified technician when the owner does not have the proper tools, support equipment or experience.
6. Test the Trailer Brakes
If the landscape trailer is equipped with brakes, test them before returning the trailer to regular service.
Watch for:
- Weak braking
- Delayed engagement
- Pulling to one side
- Locking wheels
- Grinding
- Dragging after the brake is released
- Excessive heat
- Brake-controller warnings
Electric trailer brakes must work with the tow vehicle’s brake controller. Changes in trailer load may require adjustments to the controller settings.
Brake linings, magnets, drums, wiring, hydraulic components and adjustment mechanisms should be inspected at the intervals required by their manufacturers.
7. Test Every Trailer Light
Connect the trailer to the tow vehicle and test:
- Running lights
- Tail lights
- Brake lights
- Left turn signal
- Right turn signal
- License-plate light
- Clearance lights
- Reverse lights, when equipped
Do not assume a light is working because the lens looks undamaged.
Clean corrosion from the electrical connector with an appropriate electrical-contact product. Inspect the plug for bent terminals, loose wires, moisture and damaged insulation.
Follow the wiring harness along the frame and look for sections that are:
- Pinched
- Hanging down
- Rubbing against metal
- Damaged near the axle
- Spliced improperly
- Exposed to mower or equipment contact
Secure loose wiring away from moving suspension parts and sharp edges.
8. Inspect the Ramp Gate
A landscape trailer’s ramp gate is opened, closed and driven over repeatedly. That makes it one of the trailer’s hardest-working components.
Inspect:
- Hinge pins
- Welds
- Mesh
- Expanded metal
- Latch hardware
- Spring-assist cables
- Springs
- Handles
- Support bars
- Gate stops
Look closely for cracks near the hinge area and along the paths used by mower tires.
A ramp that suddenly feels much heavier may have a damaged spring, cable or assist mechanism. Keep hands and feet away from loaded spring components and have damaged assemblies inspected professionally.
Lubricate approved hinge points without getting lubricant on surfaces where it could create a slipping hazard.
9. Inspect the Deck, Frame and Crossmembers
Remove equipment when possible so the complete deck can be inspected.
Check for:
- Broken or rotten boards
- Loose deck screws
- Raised bolt heads
- Cracked welds
- Bent crossmembers
- Frame corrosion
- Damaged side rails
- Loose fenders
- Sharp edges
- Previous repairs that are separating
Do not weld or drill into a trailer frame without understanding how the modification may affect its structure, wiring or manufacturer warranty.
Structural cracks, bent axles and damaged suspension mounting points should be evaluated by a qualified trailer-repair professional.
10. Inspect the Jack
Raise and lower the trailer jack through its operating range.
Check for:
- Binding
- A bent tube
- A damaged foot
- Loose mounting hardware
- Excessive movement
- Missing pins
- Difficulty cranking
- Corrosion
Lubricate the jack only as directed by its manufacturer. Confirm that the jack is fully raised and secured before towing.
11. Inspect Tie-Down Points and Equipment Racks
Landscape trailers often carry heavy equipment that can shift during sudden stops or turns.
Inspect:
- D-rings
- Stake pockets
- E-track
- Side rails
- Trimmer racks
- Blower racks
- Fuel-can holders
- Toolbox mounts
- Strap attachment points
Look for cracked welds, bending, loose bolts and elongated mounting holes.
Replace damaged straps, chains and binders. Do not attach equipment to a point that was not designed to handle the required load.
In-Season Landscape Trailer Maintenance
Once the busy season begins, maintenance should become part of the normal work routine.
A quick inspection before leaving the yard can catch many problems while they are still small.
Before Every Haul
Before towing the trailer, confirm that:
- The coupler is fully seated and locked.
- The safety chains are attached correctly.
- The electrical connector is secure.
- The breakaway cable is connected independently.
- The jack is fully raised.
- The ramp gate and side gates are latched.
- The tires appear properly inflated and undamaged.
- The lights work.
- The equipment is secured.
- Loose tools and debris have been removed.
- The load does not exceed the trailer’s rated capacity.
- The load is positioned to maintain safe trailer balance.
This inspection can usually be completed in a few minutes.
Weekly Inspection
For a trailer used daily, set aside time each week to inspect:
- Tire pressure
- Tire tread and sidewalls
- Wheel fasteners
- Coupler operation
- Safety chains
- Ramp latches
- Gate hinges
- Tie-down points
- Deck fasteners
- Lights
- Wiring
- License plate
- Equipment racks
Correct problems before the next heavy load whenever possible.
Monthly or Heavy-Use Inspection
Trailers used commercially may need more frequent service than trailers used occasionally.
During periods of heavy use, inspect:
- Ramp-gate hinge wear
- Spring-assist components
- Suspension bolts
- Leaf springs
- Equalizers
- Shackles
- U-bolts
- Brake operation
- Hub temperature
- Welds around the tongue and suspension
- Frame and crossmembers
- Wood-deck condition
After towing, carefully compare the temperature of the hubs without touching potentially hot components. One hub that is noticeably hotter than the others may indicate a bearing or brake problem.
A burning smell, smoke, grease leakage or extreme heat requires immediate attention.
Keep the Trailer Clean During the Season
Grass clippings and soil hold moisture against the deck and frame. Fertilizer, ice-control material, herbicides and other chemicals may accelerate deterioration.
Regularly remove buildup from:
- Deck corners
- Crossmembers
- Fenders
- Ramp-gate hinges
- The trailer tongue
- Suspension components
- Areas beneath equipment racks
Avoid directing high-pressure water into electrical connectors, bearing seals or other areas where forced water may cause damage.
Allow the trailer to dry before covering or storing it.
Post-Season Landscape Trailer Maintenance
Post-season service prepares the trailer for storage and makes the next spring startup easier.
Do not simply park a dirty trailer and forget about it until the next busy season.
1. Unload and Wash the Trailer
Remove mowers, tools, fuel cans and loose equipment.
Wash away:
- Grass
- Mud
- Fertilizer
- Chemicals
- Road salt
- Oil
- Fuel residue
- Leaves and organic debris
Clean beneath the deck and around the suspension when accessible. Allow the trailer to dry thoroughly.
2. Treat Exposed Steel
Inspect steel surfaces for chips, scratches and corrosion.
For minor surface damage:
- Remove loose rust and flaking coating.
- Clean and dry the area.
- Apply a compatible rust-inhibiting primer.
- Apply an appropriate protective topcoat.
Deep corrosion, frame perforation, cracked welds or heavily deteriorated structural areas require professional evaluation.
3. Inspect and Protect the Wood Deck
Clean the deck and allow it to dry.
Replace boards that are soft, cracked or unable to support the trailer’s intended load. Use replacement lumber and fasteners appropriate for trailer decking and the trailer manufacturer’s requirements.
A compatible wood preservative may help protect suitable decking, but it should not create a dangerously slick loading surface.
4. Service Bearings, Brakes and Suspension
The end of the working season can be a good time to schedule bearing, brake and suspension service because the trailer may be easier to leave at the shop.
This also prevents moisture, contaminated grease or worn components from sitting unnoticed through storage.
Ask the technician to inspect:
- Bearings and races
- Grease seals
- Hubs and drums
- Brake linings
- Brake magnets
- Brake wiring
- Springs
- Shackles
- Equalizers
- U-bolts
- Suspension mounting points
5. Lubricate Approved Moving Parts
Lubricate approved components according to their manufacturers’ instructions.
Depending on the trailer, these may include:
- Coupler mechanisms
- Jack gears
- Ramp-gate hinges
- Greaseable suspension bolts
- Equalizers
- Latch pivots
Do not apply grease where it can contaminate brake components or create a slippery deck or ramp.
6. Prepare the Tires for Storage
Inflate the tires to the manufacturer’s recommended cold pressure.
Store the trailer on a firm, level and well-drained surface. Avoid long-term storage in mud, standing water or tall vegetation.
For extended storage, follow the tire and trailer manufacturers’ recommendations regarding:
- Tire covers
- Sun exposure
- Supporting the trailer
- Periodically moving the trailer
- Preventing prolonged moisture contact
Do not place a trailer on unsupported blocks or unstable stands.
7. Protect the Electrical Connection
Clean the trailer plug, allow it to dry and protect it from rain and standing water.
Secure it above the ground rather than allowing it to rest in mud or snow.
Remove or maintain the breakaway battery as recommended by its manufacturer. A battery left discharged for an extended period may not work when it is needed.
8. Store the Trailer Securely
Before leaving the trailer for the off-season:
- Close and latch the ramp gate.
- Secure removable ramps.
- Lock the coupler.
- Remove valuable equipment.
- Protect registration documents.
- Confirm that water cannot collect in toolboxes.
- Park in a visible or secured location.
- Check the trailer periodically.
A breathable shelter is preferable to a cover that traps moisture against the trailer.
Warning Signs Your Landscape Trailer Needs Professional Service
Stop using the trailer and arrange an inspection if you notice:
- A wheel that moves excessively when lifted
- Grinding or rumbling from a hub
- A hub that becomes unusually hot
- Grease leaking onto a wheel or brake assembly
- Smoke or a burning odor
- A cracked wheel
- A bulging or separated tire
- Repeatedly loose lug nuts
- Weak or uneven trailer braking
- Exposed or shorted wiring
- A cracked frame or structural weld
- A bent axle
- A broken leaf spring
- Severe suspension movement
- A ramp gate with a damaged spring or cable
- A coupler that will not lock securely
- A safety chain or attachment point that is deformed
Do not continue towing in the hope that the problem will make it through one more job. A small repair can become a much larger failure when the trailer is loaded and moving at highway speed.
Landscape Trailer Maintenance Frequently Asked Questions
How often should a landscape trailer be inspected?
The hitch connection, safety chains, tires, lights, gates, load and tie-downs should be checked before every haul. More detailed inspections should be completed periodically during the season and according to the schedules provided by the trailer and component manufacturers.
Commercial trailers used every day may require more frequent maintenance than lightly used personal trailers.
How often should landscape trailer wheel bearings be serviced?
The correct interval depends on the axle, hub and bearing system. Some manufacturers use mileage and time-based intervals, while sealed or specialized systems may have different requirements.
Check the axle identification and follow the axle manufacturer’s service manual. Have the bearings inspected sooner if there is excessive movement, noise, leakage or abnormal hub temperature.
Should trailer tires be inflated to the number on the tire sidewall?
Use the trailer manufacturer’s tire-information label and the applicable tire and wheel requirements. The tire, wheel and axle must be properly matched, and maximum limits should not be exceeded.
Check pressure when the tires are cold.
Why do my landscape trailer lights keep failing?
Common causes include:
- Corroded connectors
- Poor grounds
- Damaged wiring
- Moisture inside the light
- Wires rubbing against the frame
- Loose connections
- A tow-vehicle electrical problem
- Incorrect replacement components
Repeated fuse failures or melted wiring should be diagnosed rather than repeatedly patched.
How can I keep my landscape trailer from rusting?
Keep it clean and dry, remove fertilizer and chemical residue, repair damaged coatings promptly, and inspect areas where equipment repeatedly contacts the frame.
Parking on a firm, well-drained surface and protecting the trailer from prolonged moisture exposure can also help.
Can I perform landscape trailer maintenance myself?
Owners can perform many visual inspections, cleaning tasks and basic checks. Bearing service, brake repairs, suspension work, structural welding and electrical diagnosis may require specialized tools and experience.
Improperly supporting a trailer or incorrectly assembling wheel-end and brake components can create serious safety risks.
Schedule Landscape Trailer Service With Superior Trailer
A preventive inspection costs less than losing a loaded trailer during the busiest week of the season.
Superior Trailer provides trailer parts, maintenance and repair support for landscaping companies, contractors and trailer owners throughout Virginia and North Carolina. Our technicians service all makes and models and can help identify tire, bearing, brake, axle, electrical, suspension, deck and structural problems before they become larger failures.
Superior Trailer serves customers through locations in:
- Virginia Beach, Virginia
- Suffolk, Virginia
- Richmond, Virginia
- Burlington, North Carolina
Whether your trailer needs a seasonal inspection, replacement parts, electrical repair, brake service or a more complete evaluation, Superior Trailer can help get it ready for the work ahead.
Protect your equipment, reduce avoidable downtime and keep your crew moving. Contact Superior Trailer to request landscape trailer service or a professional trailer inspection.
Need Help Deciding?
Our team can walk you through available new and used inventory and help match the right trailer to your needs and budget.
Contact us today →
